Introduction:
In this tutorial, we’ll walk you through the process of generating PDF and DOCX documents directly from your FlutterFlow app. You’ll learn how to connect your app to an external service called Documentero, and create custom templates for your documents. Whether it’s generating invoices, reports, or any other document, we’ve got you covered.
Video Tutorial
Flutterflow - Sample Document Generation App
Prerequisites:
Before we dive into the tutorial, make sure you have the following prerequisites in place:
- A registered Documentero account.
- Documentero API Key (which you’ll obtain after registration).
- Your desired document template in .docx format or created using the Documentero online editor.
- Basic familiarity with FlutterFlow and how to use custom actions.
Plugin Overview:
The Documentero custom action plugin for FlutterFlow.io provides two essential actions for document generation:
Documentero - Generate Docx/PDF: This action generates a document and provides an expirable download URL, which you can use to download the document within your app or upload it to Google Drive.
Documentero - Generate Docx/PDF and Send as Email Attachment: This action not only generates the document and provides a download URL but also sends the generated document as an email attachment. You can specify the email subject and message.
Step-by-Step Tutorial:
Step 1: Register with Documentero and Obtain API Key
- Register for a Documentero account if you haven’t already.
- Log in to your Documentero account and grab your API Key from the settings section. You’ll need this API Key later to configure the plugin.
Step 2: Create Your Document Template
- You have two options for creating your document template:
- Use the Documentero online editor to create your template.
- Upload an existing .docx template from your computer.
Step 3: Upload Your Template to Documentero
- Once your template is ready (either created online or uploaded), Documentero will generate a template ID and a sample JSON data model based on the fields detected in your template.
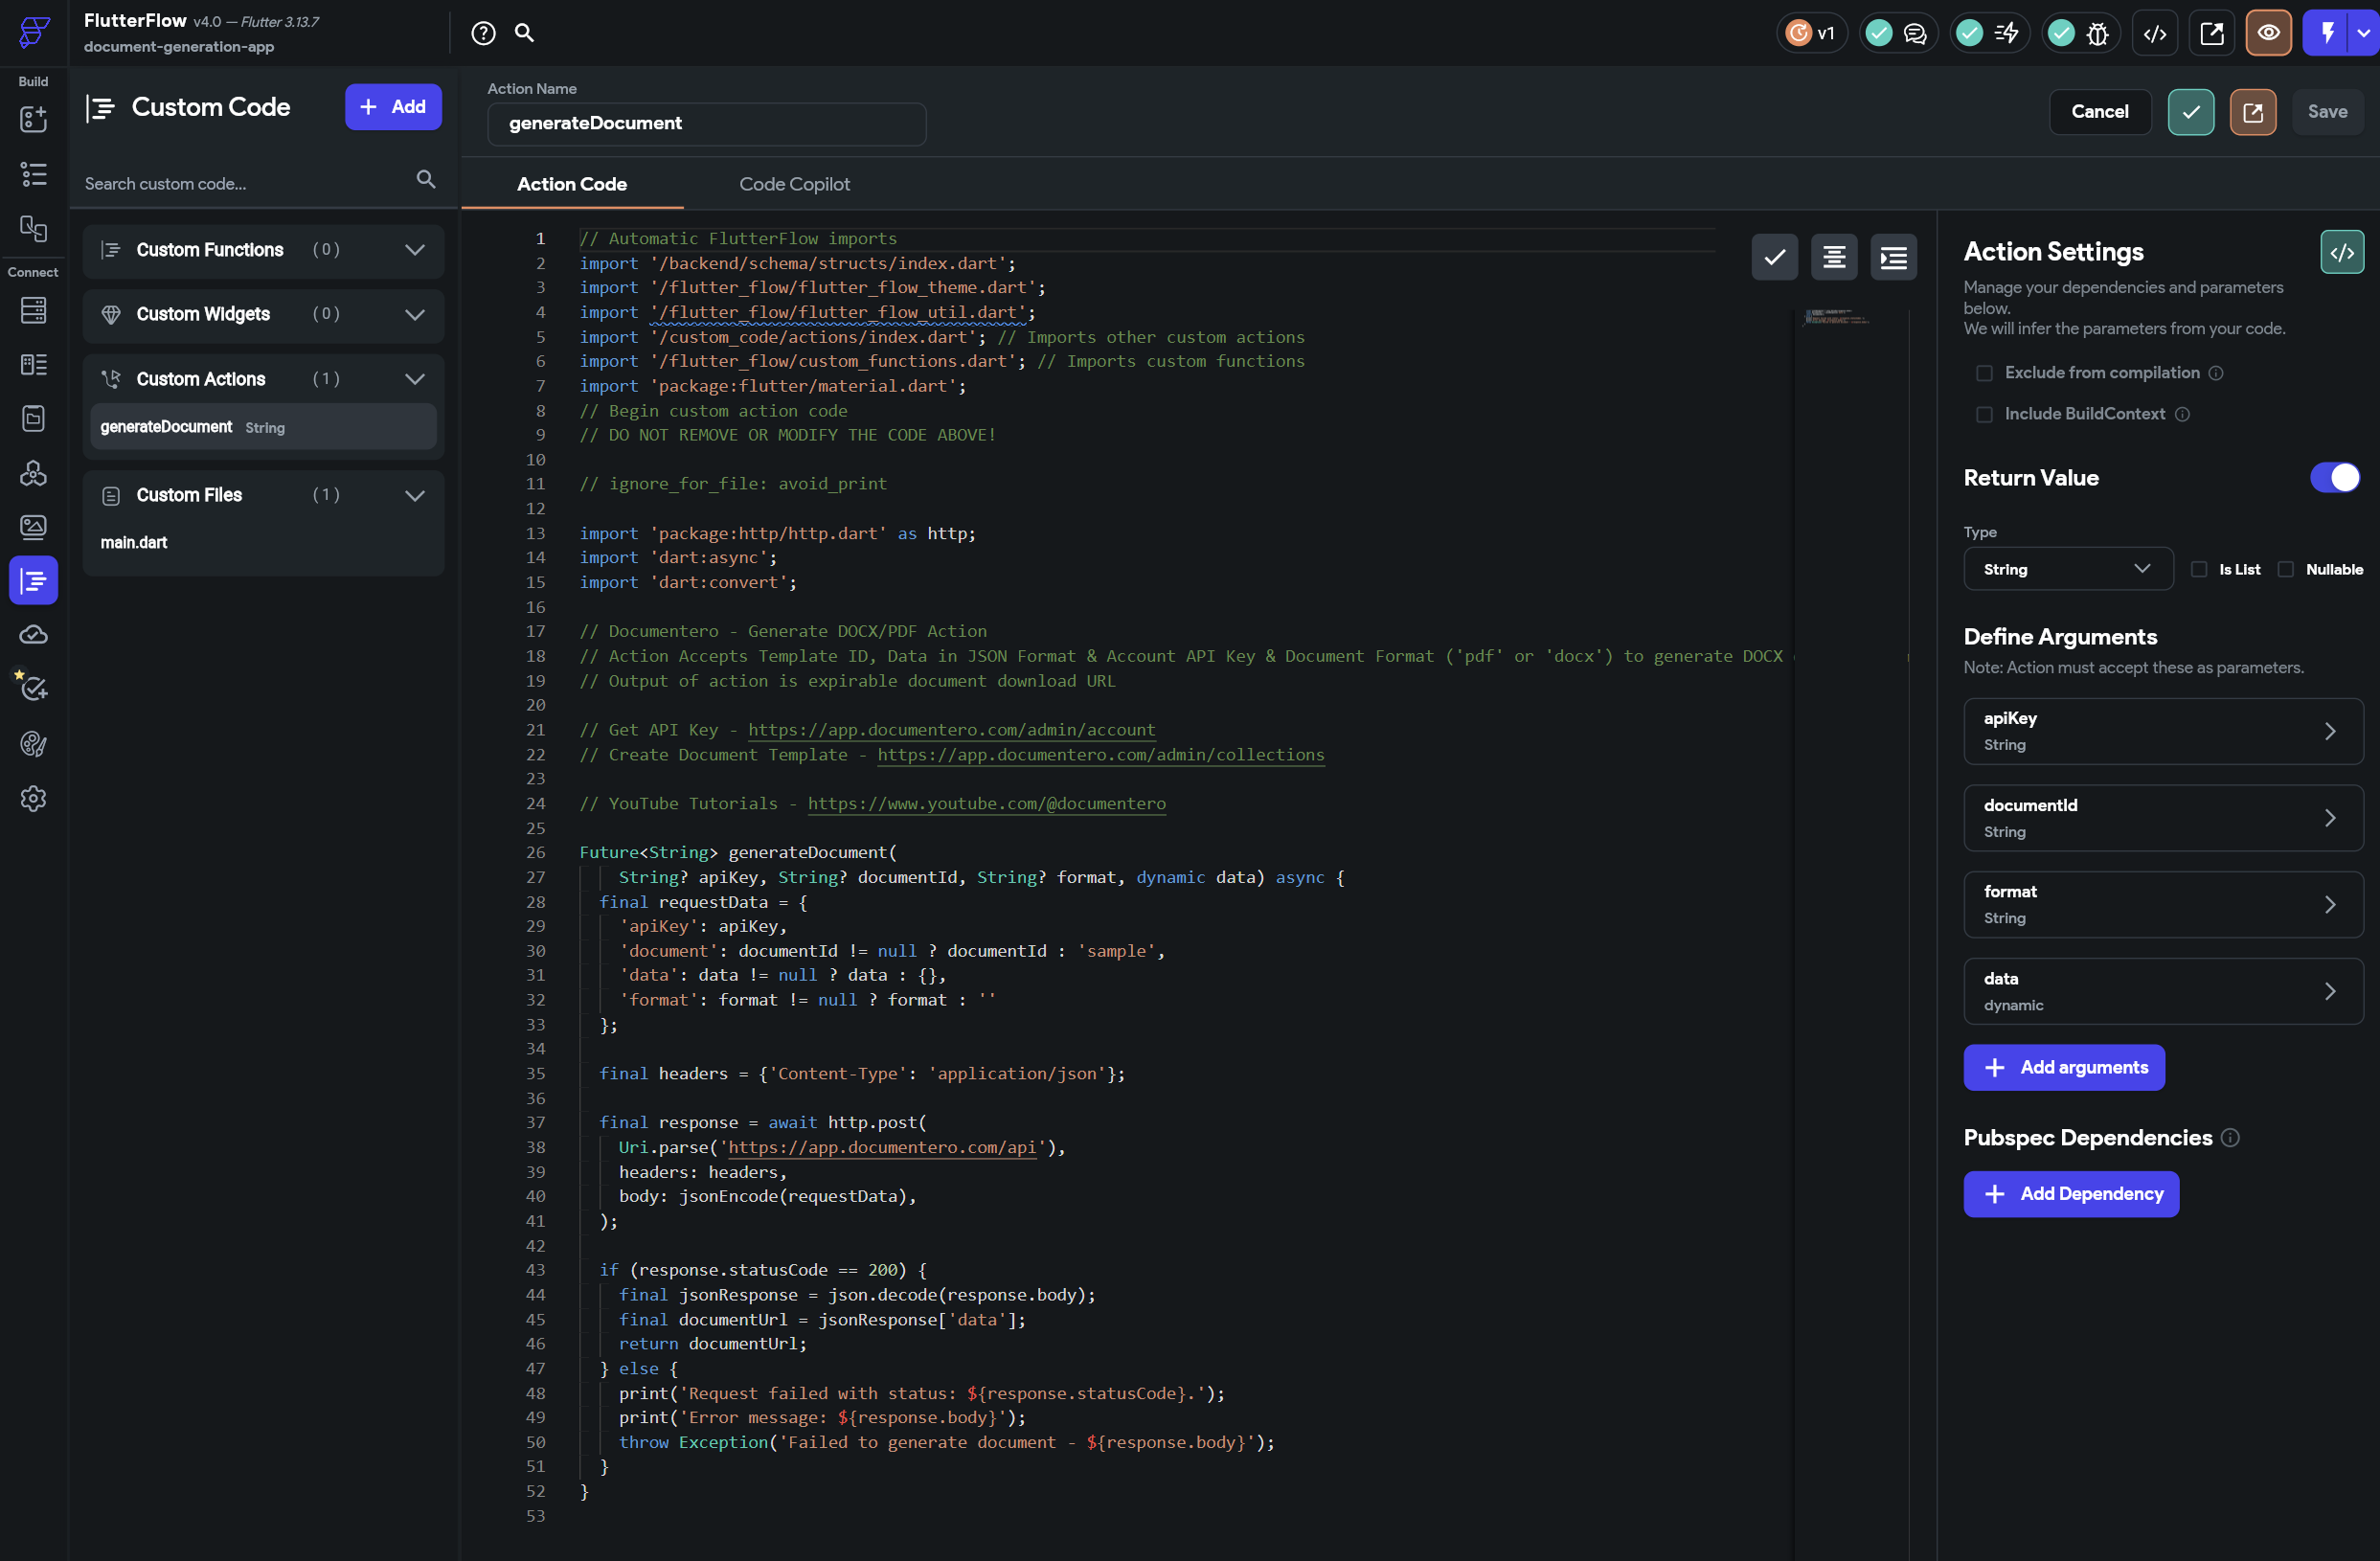
Step 4: Create Custom Code Action in FlutterFlow
- In your FlutterFlow.io app, add new custom action in “Custom Code” section. You can use the following code as a template (see at the end of the article).
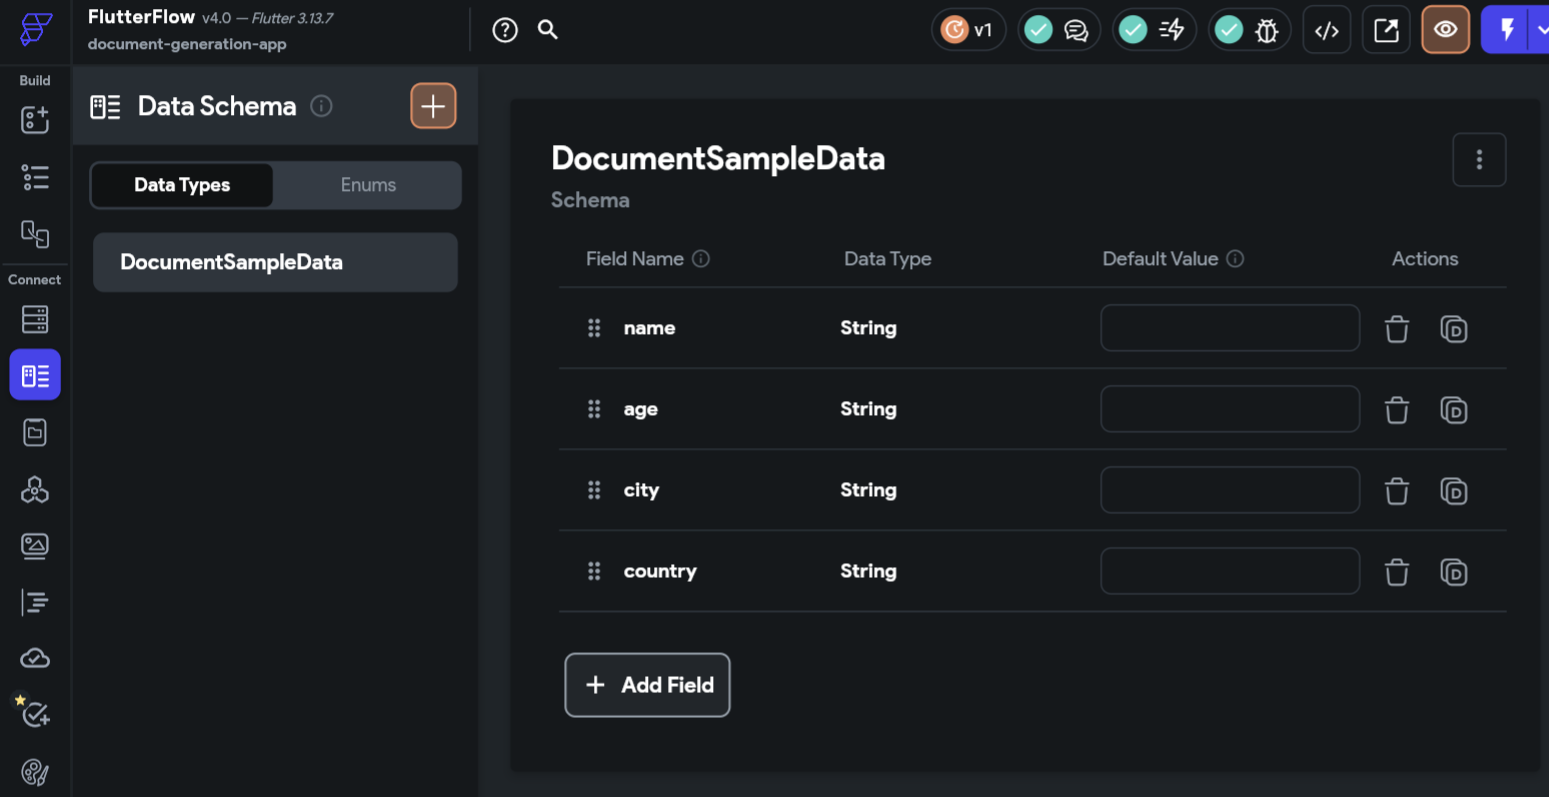
Step 5: Create Custom Data Structure in FlutterFlow that Matches Your Template Fields in Documentero
- In your FlutterFlow.io app, add new data type in “Data Types/Schema” section. And add field that are detected in your template, you can see all field in Documentero on Template Overiew / API Data Model
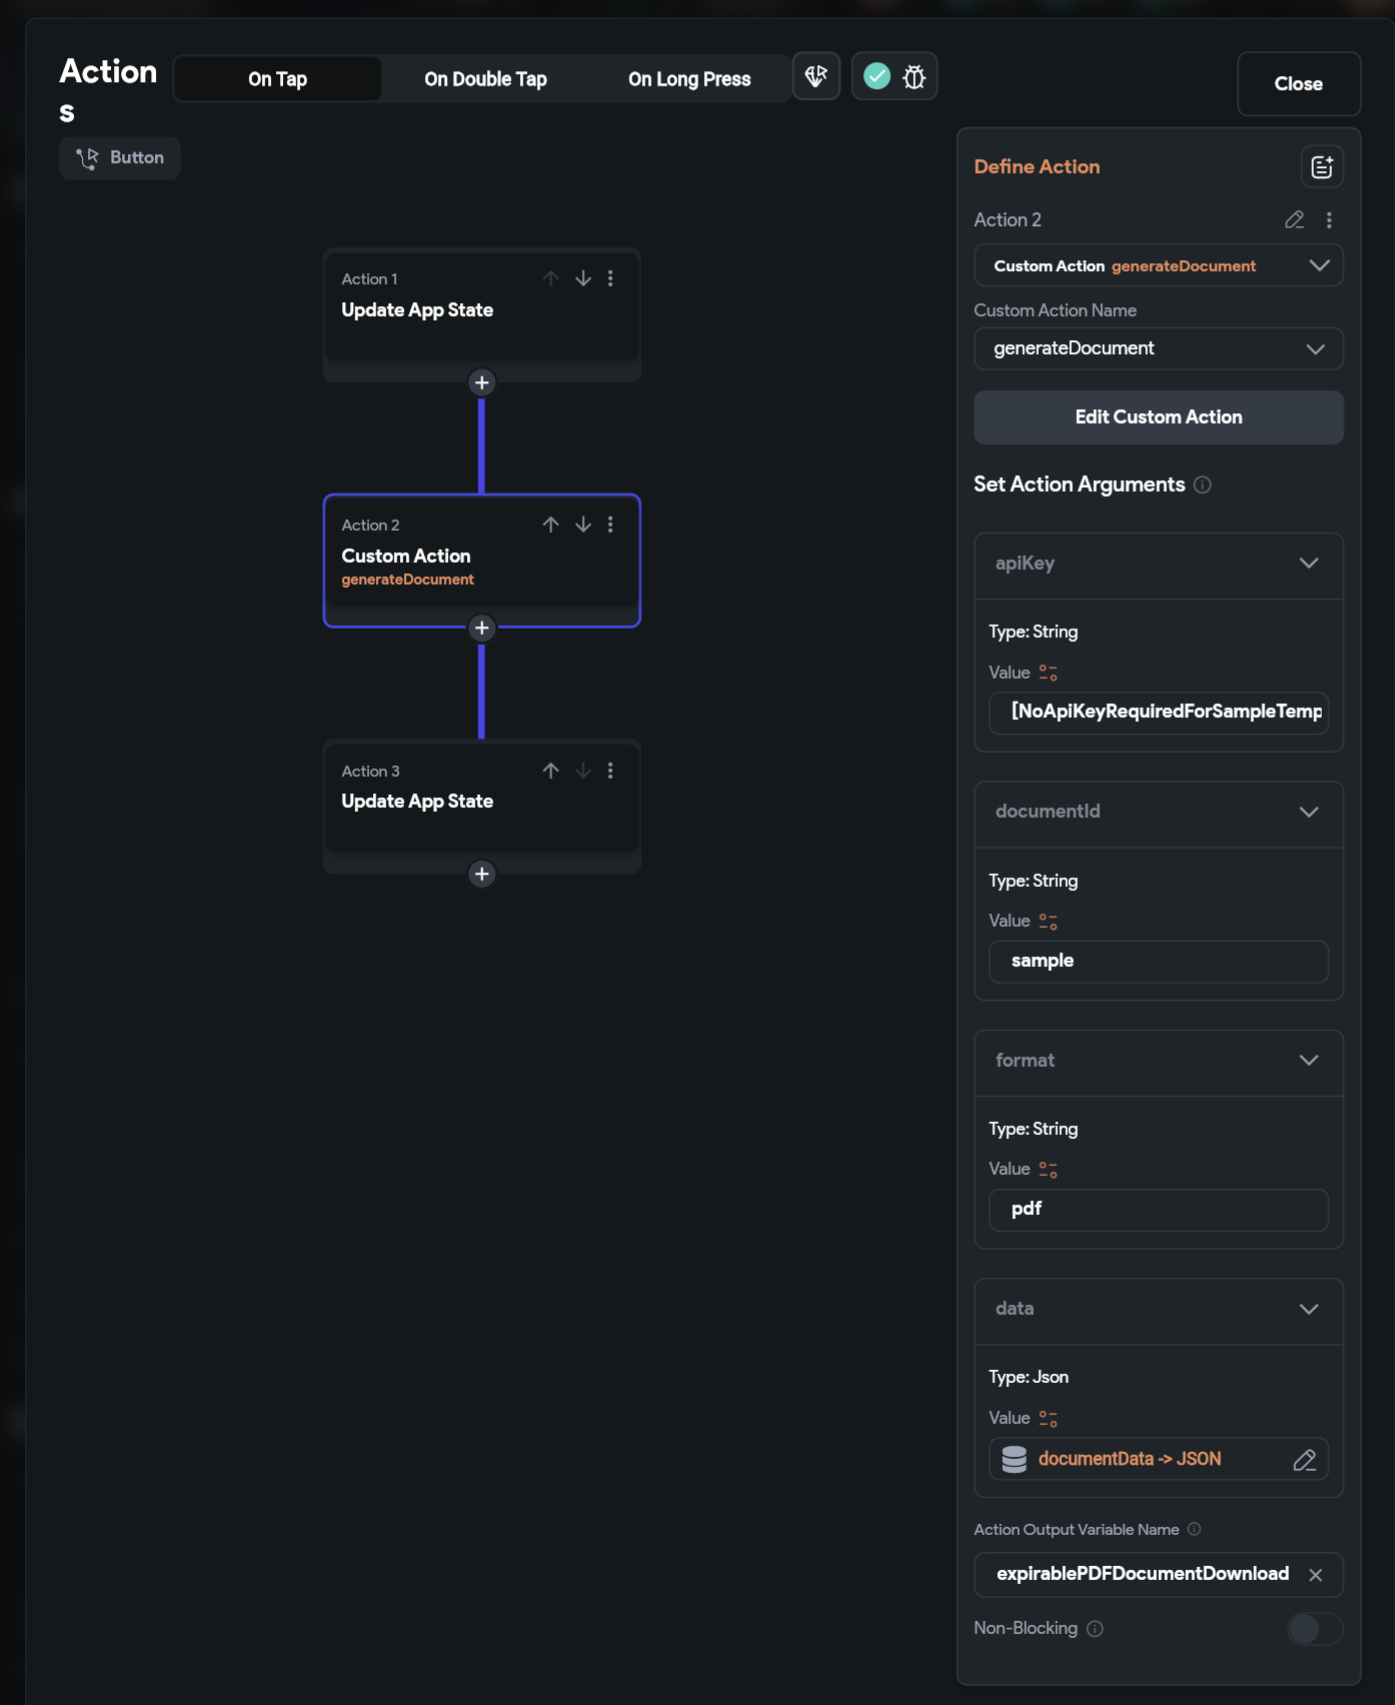
Step 6: Use & Configure Your Custom Action
- You can assign your new custom action to a workflow action or element. E.g. Your action could be called whenever button is clicked
- Configure your Documentero APIKey and Template ID in your custom action.
- Point “data” to Data Structure that you created in Step 5.
Step 7: Generate Your Documents
- Now, you’re ready to generate your documents within your Flutterflow.io app.
- You can also choose to send the document as an email attachment. If you choose to send the document via email, optionally you can specify the email subject and message.
Result:
As a result of following these steps, you will obtain a document download link. You can use this link to download the generated document within your app or pass it to other actions, such as uploading it to Google Drive. If you opted for the email option, the document will also be sent as an attachment to the specified email address.
Conclusion:
With the Documentero plugin, you can effortlessly generate custom PDF and Docx documents in your Flutterflow app, using your own templates and dynamic data. This powerful integration opens up a world of possibilities for document automation within your application.
For a visual walkthrough of this process, you can also watch the tutorial video: Creating PDF and DOCX Documents in FlutterFlow Apps | Step-by-Step Video Guide.
Start simplifying your document generation process today with the Documentero & Flutterflow!
Flutterflow Custom Action Code:
        Future<String> generateDocument(
           String? apiKey, String? documentId, String? format, dynamic data) async {
        final requestData = {
           'apiKey': apiKey,
           'document': documentId != null ? documentId : 'sample',
           'data': data != null ? data : {},
           'format': format != null ? format : ''
           // you can add 'email', 'emailSubject', 'emailMessage' to requestData to send the document as an email attachment
        };

        final headers = {'Content-Type': 'application/json'};

        final response = await http.post(
           Uri.parse('https://app.documentero.com/api'),
           headers: headers,
           body: jsonEncode(requestData),
        );

        if (response.statusCode == 200) {
           final jsonResponse = json.decode(response.body);
           final documentUrl = jsonResponse['data'];
           return documentUrl;
        } else {
           print('Request failed with status: ${response.statusCode}.');
           print('Error message: ${response.body}');
           throw Exception('Failed to generate document - ${response.body}');
        }
        }